· 9 min read
Printing the web, part 2: HTML and CSS for printing books
You wouldn't believe all that can be done with CSS for print. This article introduces all the little-known CSS properties that will allow to create a book: table of contents, page numbers, headers and footers, footnotes, etc.
(This article follows Printing the web, part 1: retrieving content from the web but can be read independently).
HTML and CSS are mostly designed for being rendered on a screen and are quite limited for advanced print features necessary for books.
The W3C has however drafted some amazing CSS features that make HTML and CSS a very convenient way to edit books.
I created a demo repository that generates a book that includes all examples exposed in this article. Here is a sample of some pages in this book:
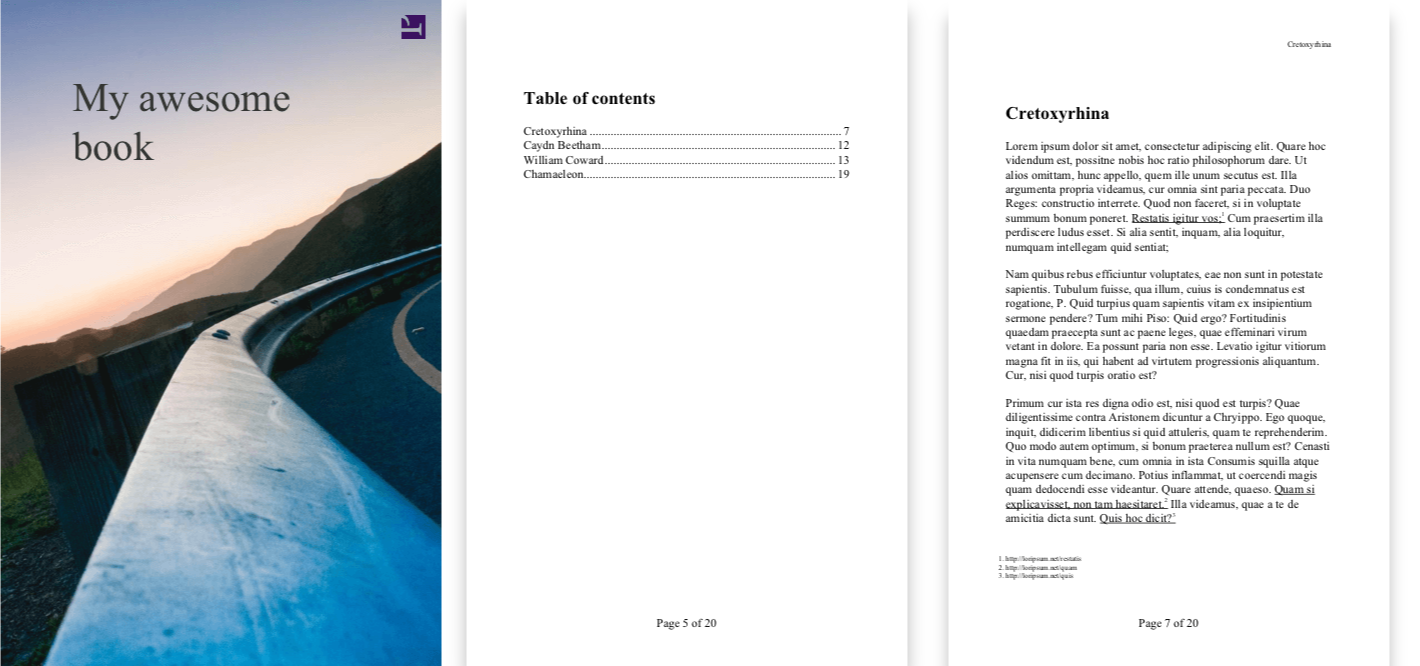
These pages show:
- A full size cover.
- Page numbers.
- A table of contents with dynamic page numbers.
- Chapter names automatically rendered in the header of each page.
- URL links rendered as numbered footnotes.
All this has been generated with HTML and CSS.
The PDF file of the generated book can be downloaded on: https://github.com/michaelperrin/blog-css-book-demo/raw/master/build/book.pdf
Page size and margins with @page
The @page CSS rule allows to define the printed pages parameters.
Page size and margins can be defined as follow:
@page {
  size: A4;

  /* Other possible values: */
  size: letter; /* US letter */
  size: 6.125in 9.25in; /* width height */

  margin: 1cm 2cm; /* use centimeters or inches depending on your needs */
}
If I am working with a book printed in the US, I generally define all the units in inches in the CSS file. If I am working on a book printed elsewhere (well, France), I will use centimeters or millimeters for all units.
The @page rule has several pseudo-classes that allow to target specific pages in the document:
:blank:first:left:right- named pages with the
page: my_nameproperty.
We will make use of several of these pseudo-classes in the next sections, but here is a first example to set specific margins on the first page:
@page :first {
  margin: 2cm;
}
Page number in the footer
Displaying page numbers is a very common feature for all books. We are going to use this CSS snippet for that purpose:
@page {
  @bottom-center {
    content: counter(page);
  }
}
You can of course define additional properties to style the page number.
In addition to the specific CSS counter for page, you can use counter(pages) to get the total number of pages. Displaying something like “Page 3 of 15” would be done with:
@page {
  @bottom-center {
    content: 'Page ' counter(page) ' of ' counter(pages);
  }
}
Display chapter name in page header
We are going to make use of the string-set property defined in the CSS Generated Content for Paged Media Module which is still a working draft at the W3C.
What this property does is to dynamically set the value of a variable based on the content that we will be able to reuse in an other CSS property.
As we saw, I am using the <article> tag for each new chapter of my book. Each chapter starts with its title which is contained in a <h2> heading tag:
<article>
  <h2>Chapter title</h2>

  <!-- ... -->
</article>
We can now define in CSS that the chapter title is to be found in each <h2> tag and will be stored in a variable called chapter_title:
h2 {
  string-set: chapter_title content();
}
I will now display the current title on the left part of the page for left pages, and on the right part of the page for right pages thanks to specific pseudo selectors! Isn’t that awesome?
@page :left {
  @top-left {
    content: string(chapter_title);
  }
}

@page :right {
  @top-right {
    content: string(chapter_title);
  }
}
Rendering links as footnotes with CSS
Printing a <a> link doesn’t make much sense on paper. This is what I chose to do instead:
- Underline the text of the link text so that the reader knows which parts of the text is a link, but use same text color as normal text (
color: inherit). - Add a footnote number after the link text.
- Print the link URL as a footnote on the page.
- Reset the footnote numbering for each new page or chapter (in my case, a blog article).
That means that somethink like:
<article>
  <p>
    Visit this <a href="https://example.com/test">awesome website</a> and
    <a href="https://example.com/yay">that one</a> too.
  </p>
</article>
Should be rendered as:
<p>
  Visit this <span style="text-decoration: underline;">awesome website</span
  ><span style="vertical-align: super; font-size: smaller">1</span> and
  <span style="text-decoration: underline;">that one</span
  ><span style="vertical-align: super; font-size: smaller">2</span> too.
</p>
with the following footnotes displayed at the bottom of the page:
<p>
  <span style="font-size: smaller">1.</span> https://example.com/test<br /><span style="font-size: smaller">2.</span>
  https://example.com/yay
</p>
To do so, the usual CSS properties are not enough. We are going to use the CSS Generated Content for Paged Media Module which is still a working draft at the W3C and not supported by current browsers (which is not an issue if you read on the article).
Each chapter is rendered inside an <article> HTML tag. The footnote counter will be reset for each article. We will get exactly what we want by using the following CSS:
article {
  counter-reset: footnote;
}

article a {
  text-decoration: underline;
  color: inherit;
}

article a::after {
  content: attr(href);
  float: footnote;
  font-size: 0.6rem;
  text-align: left;
  color: inherit;
}
Note the content: attr(href) that allows us to display the link URL in the footnote and the unusual value for the float property with float: footnote.
Table of contents (TOC)
We want to render a table of contents at the beginning of our book that looks like this, with dynamic page numbers and the dots to separate the chapter title and the page number:
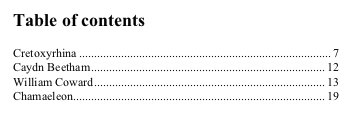
Let’s update first the HTML of the book to add some IDs so each <article> element and create the table of contents (this could be automatically generated by scripts or React, as seen in part 1):
<div class="table-of-contents">
  <h2>Table of contents</h2>

  <ul>
    <li><a href="#chapter-1">Chapter title</a></li>
    <li><a href="#chapter-2">Chapter title 2</a></li>
    <li><a href="#chapter-3">William Coward</a></li>
    <li><a href="#chapter-4">Chamaeleon</a></li>
  </ul>
</div>

<article id="chapter-1">
  <h2>Chapter title</h2>
  <!-- … -->
</article>

<article id="chapter-2">
  <h2>Chapter title 2</h2>
  <!-- … -->
</article>

<!-- … -->
And then add the CSS:
.table-of-contents ul {
  list-style-type: none;
  margin: 0;
  padding: 0;
  page-break-after: always;
}

.table-of-contents ul li a {
  color: inherit;
  text-decoration: none;
}

.table-of-contents ul li a::after {
  content: leader('.') target-counter(attr(href), page);
}
Noteworthy things:
- The special
leader()function (as part of the CSS Generated Content Module Level 3) will render dots before the page number at the end of the line. - The
target-counterfunction is part of the specification and allows use to get the page number the links heads to (isn’t that awesome?). - I recommend to read the documentation of
target-counteras it has some other options, like rendering pages with other styles.
Cover page
Let’s add a cover page with a full size background image and a title.
HTML code:
<div class="cover">
  <h1>My awesome book</h1>
</div>
CSS:
.cover {
  page: cover;
  position: absolute;
  width: 100%;
  height: 100%;
  background-image: url('cover.jpg');
  background-repeat: no-repeat;
  background-size: cover;
}

.cover h1 {
  margin: 1in;
  color: #333;
  text-align: left;
  font-weight: 300;
  font-size: 3.4rem;
}

@page cover {
  margin: 0; /* Use a full size page */

  /* Remove page numbers for the cover */
  @bottom-center {
    content: none;
  }
}
Various layout tweaks
Handling chapters
Starting new chapters on a new page is quite easy by using the page-break-after property:
article {
  page-break-after: always;
}
If the chapter contains subtitles rendered as headings (<h3> for instance), it may be a good idea to avoid page breaks after them:
article h3 {
  page-break-after: avoid;
}
Now imagine that you want every chapter to start on the right page (which is the verso). Instead of the page-break-after: always;, we are going to use the recto value:
article {
  page-break-after: recto;
}
The verso value is of course available as well.
Improve the rendering for paragraphs
If the paragraphs of your book are small, you can also avoid splitting them on several pages:
article p {
  page-break-inside: avoid;
}
We can actually do even better! Two additional CSS properties from the CSS Fragmentation module allow us to define how many lines must be left at the bottom of the page (avoid having only one paragraph line at the bottom of a page), and the minimum number of lines that should be on the next page. The two properties are orphans and widows. Let’s update the CSS code:
article p {
  orphans: 2; /* no less than 2 lines at the bottom of the page */
  widows: 3; /* no less than 3 lines at the top of next page */
}
Blank pages
For rendering blank pages, I create a special CSS class that allows me to easily insert these pages in my HTML document:
<div class="blank-page"></div>I then style them with the following CSS attributes:
.blank-page {
  page: blank;
  page-break-after: always;
}
With the page property, we defined the type of the page (blank is not a reserved keyword, that is just a string that I chose).
We can then apply some specific styles for all pages that have the blank type. Let’s remove chapter titles and page numbers on blank pages, so that they are really blank:
@page blank {
  @bottom-center {
    content: none;
  }

  @top-left {
    content: none;
  }

  @top-right {
    content: none;
  }
}
Rendering the book as a PDF file
Modern browsers (including Firefox and Chrome) don’t support most of the CSS features that I have used in this article. Opening the HTML file and printing it as a PDF file will not render the expected result.
But there is an amazing tool called Prince XML which is a command line tool to convert HTML files to PDF and that supports all of these advanced (and experimental) CSS features.
You can install it locally and create the PDF file from the HTML. I also created a Docker image for it, that makes it very easy to convert a HTML file without installing anything. To convert a book.html file stored locally and save it as a book.pdf file in the build/ folder, just run:
docker run —rm
-v “pwd”:/data
michaelperrin/prince:latest
-o /data/build/book.pdf
/data/book.html
You are all set! Just find a nice printing service to send your PDF file and get it as a real good old paper book! I have always been very happy with Blurb for both picture book and text books (novels), but there must be plenty of other ones.